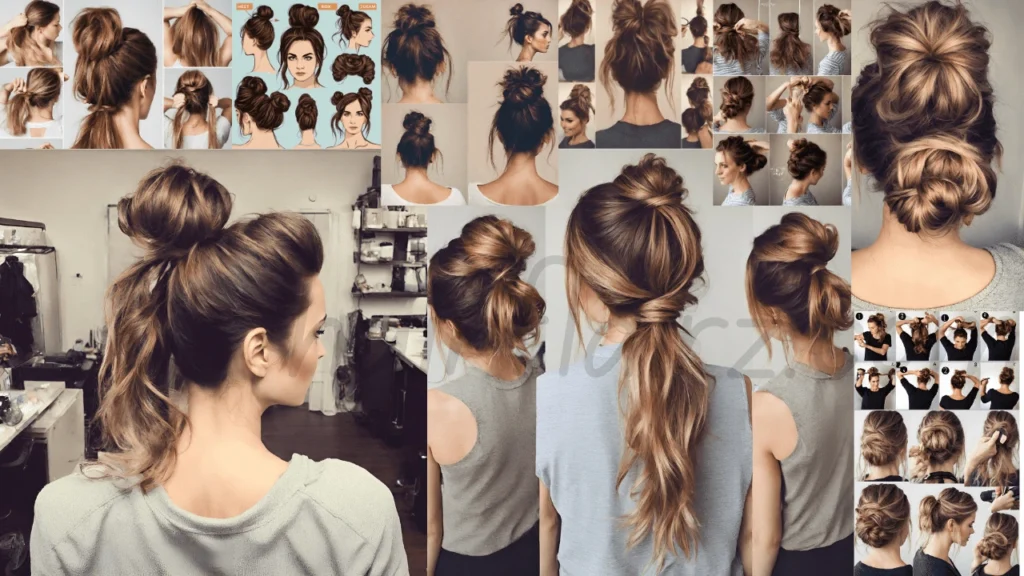
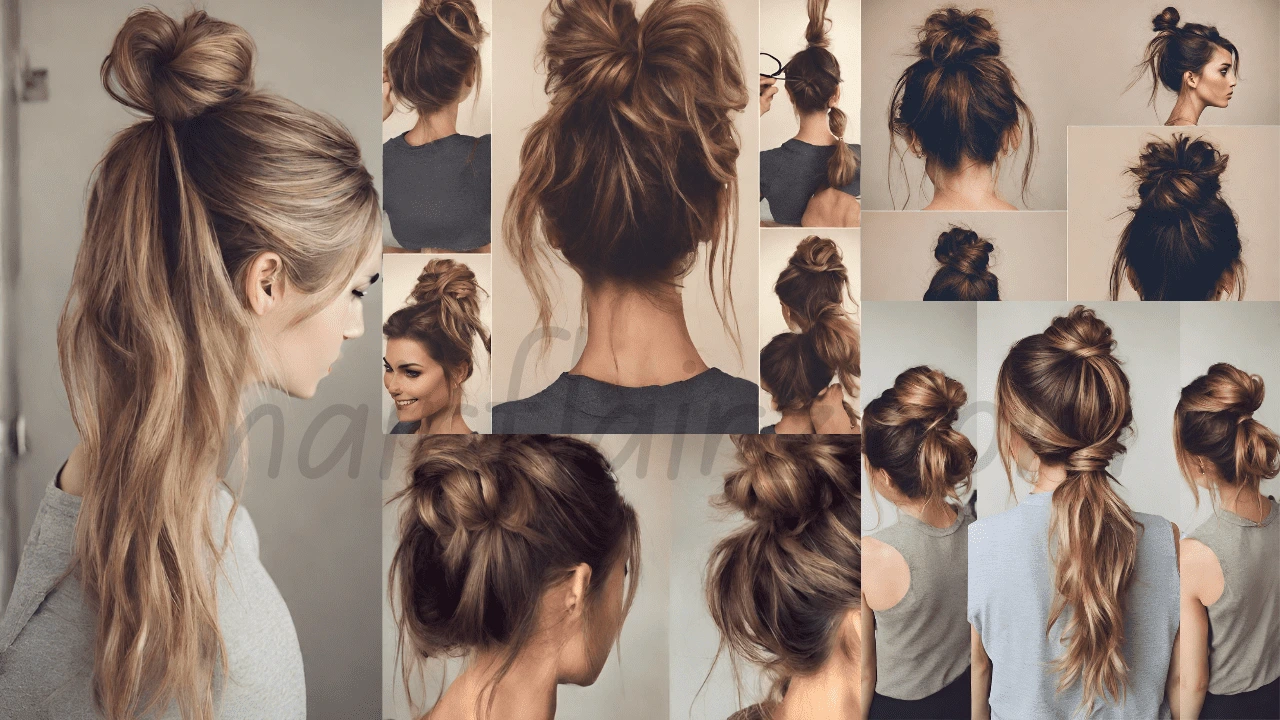
Creating a messy bun is a versatile and popular hairstyle that can be worn for casual outings or more formal events. It exudes a relaxed yet chic vibe, making it a go-to choice for many. In this step-by-step guide, we’ll walk you through the process of achieving the perfect messy bun.
Materials Needed
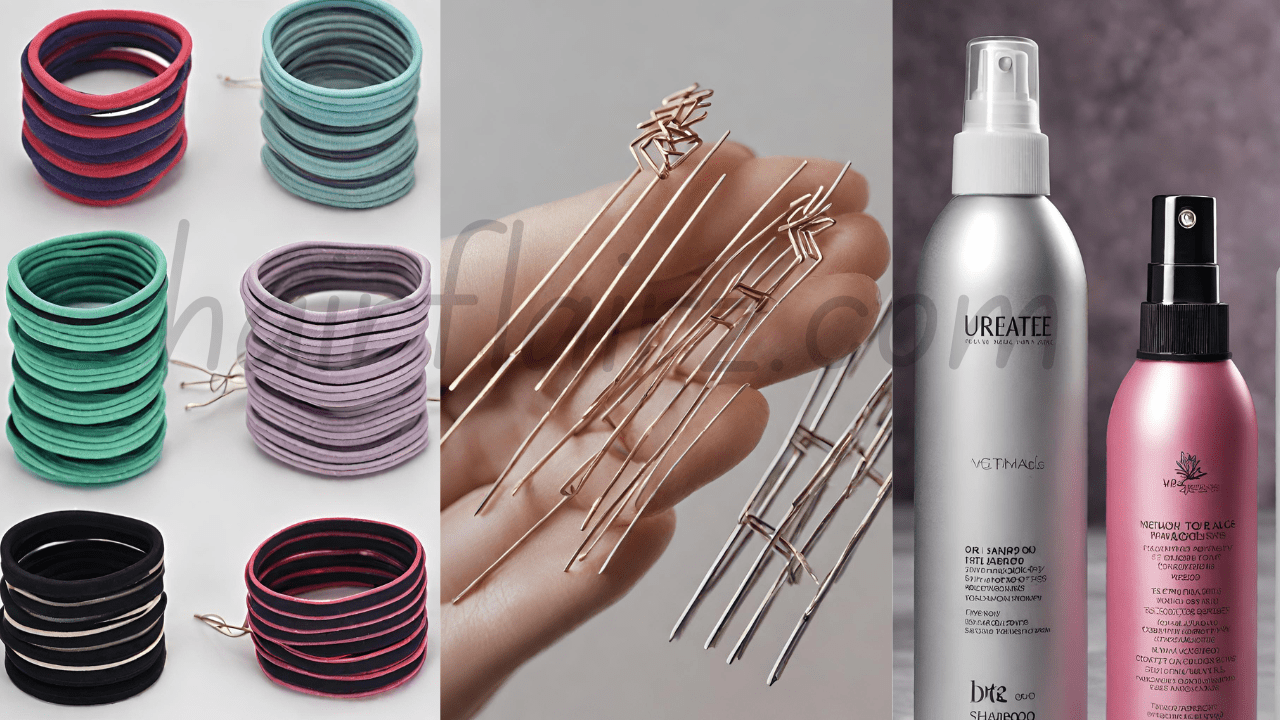
When it comes to creating the perfect messy bun, having the right materials on hand is key to achieving that effortlessly chic look. First and foremost, you’ll need a selection of hair elastic bands. These will be the backbone of your messy bun, holding everything in place. It’s essential to have a variety of sizes and colors to match your hair and accommodate different bun styles. Next up are bobby pins.
These little heroes play a crucial role in securing loose strands and keeping your bun in place throughout the day. Having an ample supply of bobby pins ensures that your bun stays intact, no matter how busy your schedule gets. Additionally, consider investing in a good quality texturizing spray or dry shampoo. This product adds grip and texture to your hair, making it easier to style and ensuring your messy bun holds its shape.
It’s particularly useful for those with silky or fine hair textures. With these materials in your arsenal, you’ll be well-equipped to create a stunning messy bun that exudes confidence and style.
Material for Messy Bun
Hair Elastic Bands
Ensure you have a few hair elastics on hand. Opt for those that match your hair color for a seamless look.
Bobby Pins
These will help secure any loose strands and hold the bun in place.
Texturizing Spray or Dry Shampoo
Adding texture to your hair makes it easier to style. A texturizing spray or dry shampoo can provide the necessary grip.
Step 1: Prep Your Hair
Before you embark on the journey of crafting the perfect messy bun, it’s crucial to ensure your hair is in the optimal condition. Start with clean, dry hair as this provides a clean canvas for styling. If your hair has recently been washed, consider using a texturizing spray or dry shampoo.
This addition adds a little grip to your hair, so it’s easier to style and makes your messy bun look bigger and more textured. Gently brush through your hair, taking care to remove any knots or tangles. This step not only aids in creating a smooth base but also ensures that the bun sits comfortably without any discomfort.
By preparing your hair in this manner, you’re setting the stage for a messy bun that’s not only stylish but also long-lasting. So, take a moment to pamper your locks, and you’ll be well on your way to achieving that effortlessly chic messy bun look!
Prep Your Hair
Step 2 : Brush and Detangle
In Step 2 of creating the perfect messy bun, it’s crucial to begin with a clean canvas. Gently take a reliable hairbrush and carefully work through your locks, starting from the ends and working your way up to the roots. This process not only removes any knots or tangles but also ensures that your hair is smooth and ready for styling. Be patient, and use gentle strokes to prevent unnecessary breakage.
If you encounter a particularly stubborn knot, don’t force it—instead, use your fingers or a wide-toothed comb to gently tease it apart. Remember, the goal is to achieve a base that’s not only manageable but also sets the stage for a beautifully tousled messy bun. Taking this step ensures that your final look will have a natural, effortless charm that’s bound to turn heads.
Brush and Detangle
Step 3: Create a High Ponytail
Create a High Ponytail for messy buns is a pivotal step in achieving the perfect, effortlessly chic messy bun hairstyle. With your clean, dry hair prepped and detangled, it’s time to gather it at the crown of your head. Using your fingers, gently pull your hair upwards, ensuring it sits high and secure.
The key here is not to worry about perfection; a slightly tousled look adds to the charm of the final result. Once you’ve gathered your hair, secure it in place with a hair elastic. This high ponytail sets up your messy bun. It gives the base for the next steps.
It gives the shape and support needed. Remember, this style is all about embracing a relaxed and carefree vibe, so don’t fret over any loose strands or imperfections. In fact, they often add character to the final look. With your high ponytail in place, you’re now ready to move on to the next phase of creating your beautiful messy bun.
Create a High Ponytail
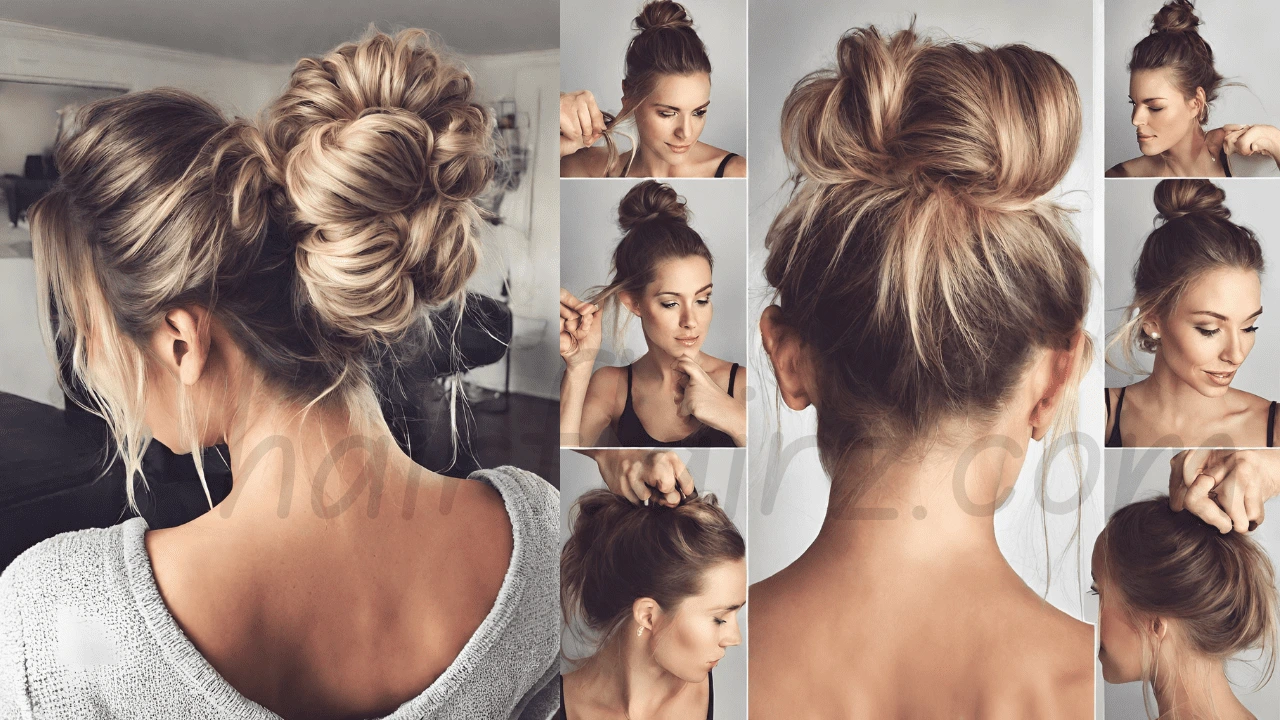
Step 4: Tease the Ponytail
Let’s learn how to make a messy bun by teasing the ponytail. This makes your hair look thicker and have more texture. It’s an important step to get that cool, messy bun look.
First, hold your ponytail gently. Take a comb or use your fingers to tease the hair. Teasing means brushing the hair in the opposite direction it grows. This gives it a little puff. It makes your bun look full and textured, like you’ve been having a fun day.
Remember, be gentle so you don’t hurt your hair. As you tease, you’ll see your ponytail get bigger. This makes it easier to shape into a messy bun.
This step is like a secret trick for a casual chic messy bun. Even hairstylists love using it for that effortlessly undone look.
Tease the Ponytail
Step 5: Divide and Conquer
We take a pivotal turn in the process. First, separate the teased ponytail into smaller sections. How thick your hair is determines how many sections you should make. Each section needs special care. This separation is important for making a messy bun that looks just right—both neat and casual. Taking your time in this step is key. Pay close attention to the details. Get ready to see the bun come together beautifully in the next steps.
Divide and Conquer
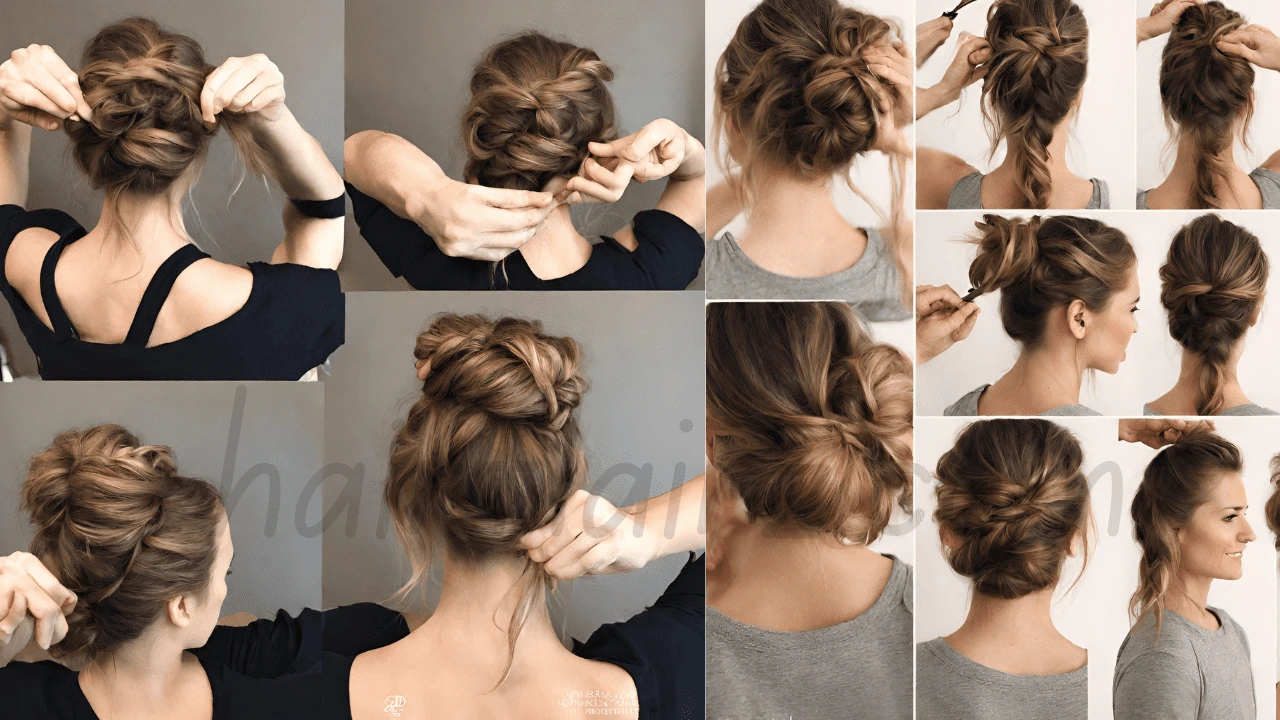
Step 6: Twist and Wrap
We take the teased ponytail and begin the transformation into the iconic messy bun. This step is all about creating texture and volume within the bun itself. Starting with one section of the divided ponytail, gently twist it, allowing the strands to coil around each other in a loose, carefree manner.
It’s important not to overthink this process; the beauty of a messy bun lies in its effortless charm. Once the section is twisted, carefully wrap it around the base of the ponytail, creating the foundation of the bun. This wrapping motion adds depth and dimension to the hairstyle, giving it that sought-after voluminous look. As you secure this first section in place with bobby pins, you’ll notice the bun taking shape, and the tousled, relaxed vibe starting to emerge.
Do these steps with the other sections. Make sure each one makes the messy bun look full and textured. Use bobby pins if some parts are loose. But don’t worry if a few strands stick out, it makes the bun look natural and cool. When you finish this step, you’ll have a messy bun that looks stylish and carefree – a true sign of how artistic messy buns can be.
Twist and Wrap
Step 7: Repeat and Secure
First, divide the ponytail into sections. Then, wrap them around the base carefully. Remember, balance is key. Be gentle as you wrap each section, letting the hair fall naturally. This creates a stylish, effortless look. Use bobby pins to secure the twists. Make sure they’re hidden but strong enough to stay in place. This step is crucial in making a messy bun. It’s where precision and art come together to create a casually elegant hairstyle. Each twist and pin brings you closer to that relaxed yet sophisticated messy bun look!
Repeat and Secure
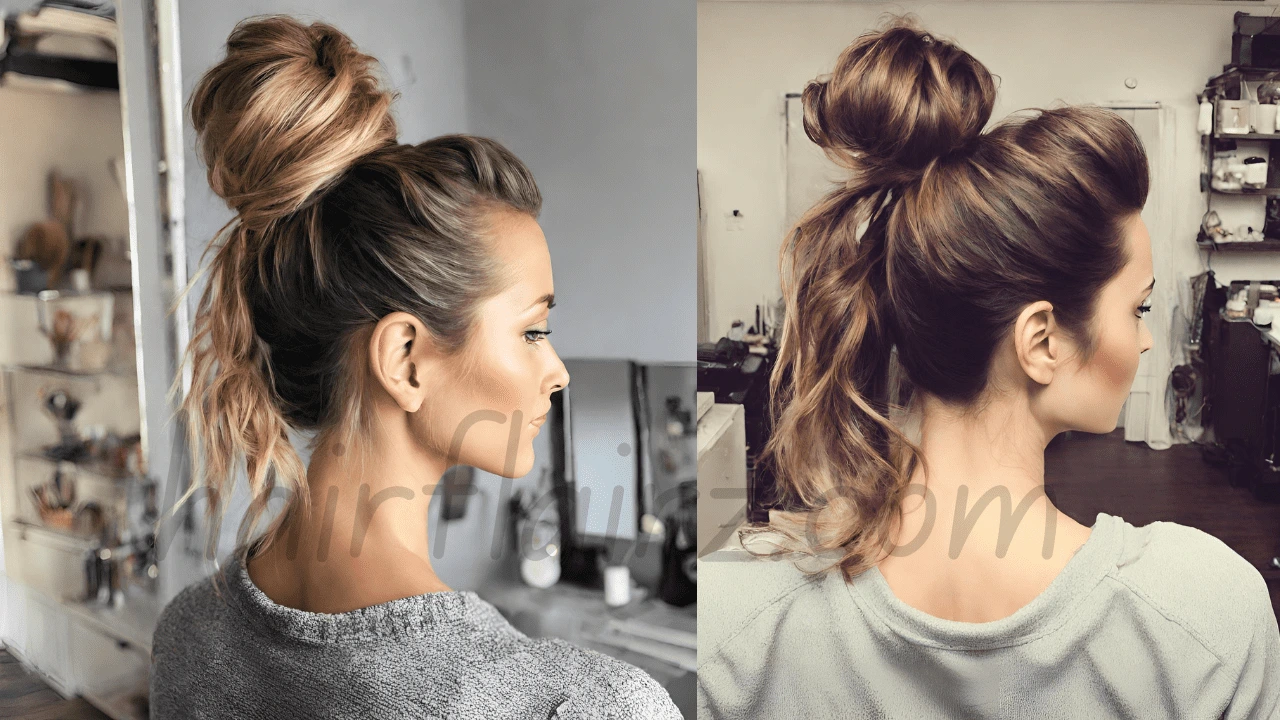
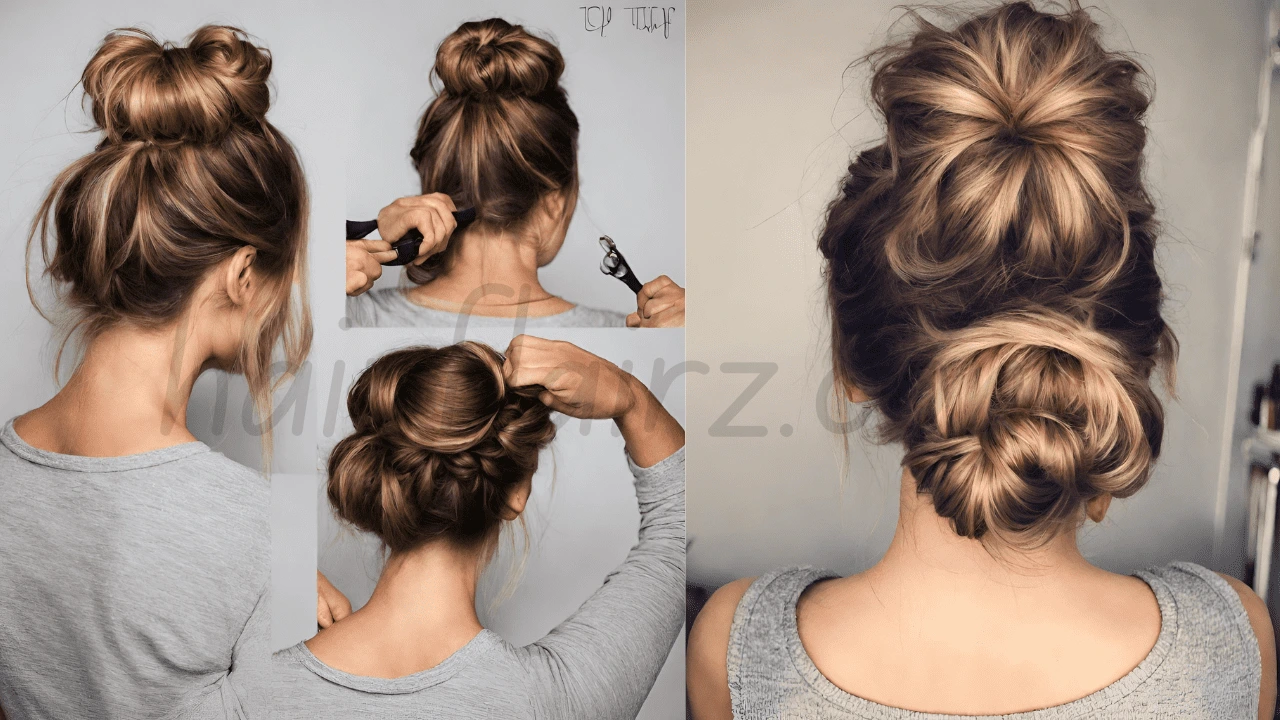
Step 8: Tug and Adjust For Messy Bun
We fine-tune our messy bun to achieve that effortlessly undone look. This step is all about embracing the imperfections and adding character to your bun. Gently grasp sections of the bun and pull them slightly to create a looser, more relaxed appearance.
Don’t be afraid to let a few strands escape; it’s these subtle imperfections that give the messy bun its signature charm. Take a step back, assess the overall look, and continue to adjust until you’re satisfied with the level of ‘messiness.’ Remember, the beauty of the messy bun lies in its organic, unstructured nature, so trust your instincts and have fun with it!
Tug and Adjust
Step 9: Lock It In
You’re putting the finishing touches on your messy bun masterpiece. This crucial step ensures that all your hard work stays in place throughout the day. A light mist of hairspray is your secret weapon here, acting as the ultimate styling ally. When you spray it on, you’re not just making the style, you’re locking in all the work and creativity you put into making that perfectly your style.
The hairspray works like an invisible shield, holding each strand where it should be while still letting it move naturally. This step is important. It makes your messy bun go from not quite finished to looking really good. Take your time and savor what you created. Your messy bun will stay stylish all day, no matter where you go.
Tug and Adjust
Conclusion
Congratulations! You’ve mastered the art of creating a perfect messy bun. This effortlessly chic hairstyle is suitable for various occasions, from casual hangouts to formal events.
FAQs
Can I do a messy bun with short hair?
Absolutely! While it may require a bit more creativity, you can achieve a stylish messy bun with shorter hair using bobby pins and a bit of texturizing spray.
How can I make my messy bun last all day?
To make your messy bun last longer, be sure to use a good quality hairspray and secure it with enough bobby pins. Additionally, avoid touching or tugging on the bun throughout the day.
Can I create a messy bun with curly hair?
Yes, curly hair can add a beautiful dimension to a messy bun. Follow the same steps, but allow some curls to naturally frame your face for an even more relaxed look.
Are there variations of the messy bun I can try?
Absolutely! You can experiment with different placements (low, side, or high bun) and vary the level of 'messiness' to suit your personal style.
How do I accessorize a messy bun?
Consider adding hairpins, a decorative comb, or a stylish headband to elevate your messy bun for a special occasion. Just be sure to insert them gently to avoid disrupting the style
2 thoughts on “How to Do a Messy Bun in 2024: A Step-by-Step Guide”


Pingback: 2024's Trendy Wavy Hair Styles: How to Achieve and Maintain Them - hairflairz.com
Every weekend i used to go to see this website, as i want enjoyment,
as this this site conations actually fastidious funny stuff too.